Tips and Tricks: How to Make a Minicomic
Stop drawing in your sketchbook! It's time to make something other people can read!
Making a minicomic is how I started realizing that there is more to being a cartoonist than drawing characters in cool poses (or the only poses I know how to draw) in your sketchbook. You have to break out of your old, bad habits and actually draw the same character forty times in a row, and make him or her look the like the same person from every angle.
So let's start. You'll need the four Ps (pen, paper, photocopier, and pagination guide)
Pen:

Any old one will do, of course, but here are some recommendations:
Pentel Pocket Brush Pen:
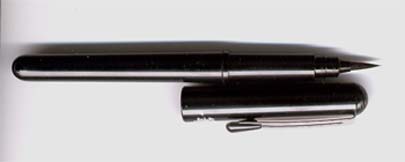
We've recommended this before, and it's great. You can buy them online at Wet Paint in St. Paul, MN. It does take some practice to get it to do what you want, so if you're just starting out, you might want to use something a little easier to work with.
Pigma Micron pens:

These go from really thin to really thick. Your best bet is to use between an 03 and an 08. 03 is good for lettering when you're working print size. 08 is good for drawing panel borders. 05 is an all-around good pen for drawing.
Paper:

Any old paper. We like to use Xerox Color Xpressions, which is a slightly glossy laser paper. But especially with the Micron pens, any kind will do.
Photocopier:
Kinko's. They're everywhere. They'll do the photocopying for you, behind the counter, but if you don't want to wait every time, and if you want to have some control over what the final product looks like, you'll want to learn the tricks of the self-serve copier.
One big thing is figuring out how an image oriented on the glass relates to the image on the paper. Does it come out upside down? Look at the paper as it comes out of the copier. Open up the paper tray and draw an arrow on the top sheet showing where you think is up, and what side you think the image will print on. Copy a page and see if you're right. Then-- REMEMBER that. It will be important when you run the pages through to print on the back.
Pagination guide:
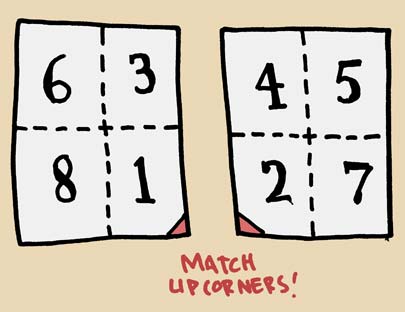
Here's one for an 8 page comic, with page 1 being the front cover and page 8 being the back cover.
You can figure these out logically, but this guide should help you get started. The important part is that you just remember that each page should be on the back of a consecutive number.
Okay, let's start drawing.
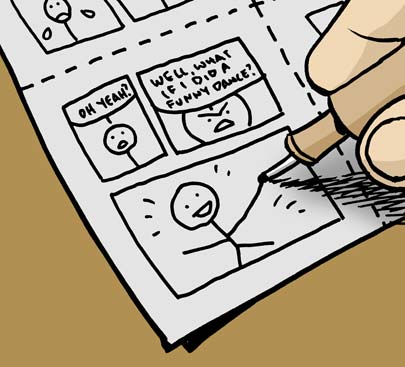
When you finish drawing, it will be hard to read your comic. When you draw according to the pagination guide, your pages will be (seemingly) all out of order, and people won't easily be able to check out your story. Better go and print it, quick!
Some of the things I like to do with minicomics:
1. Make the cover and back cover story pages. Minicomics to me are all about substance, not style. They aren't color, they aren't printed on particularly nice paper, so let's make this all about the story, and cram it full of as much content as we can. Other people look at minicomics as art objects, and print them on nice paper, and add color with a silkscreen or some other process. That's cool too.
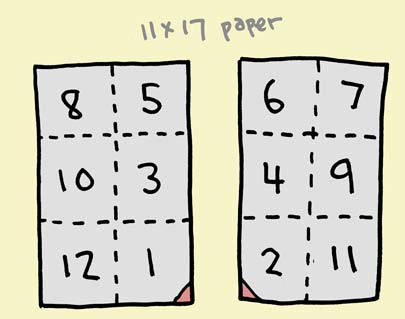
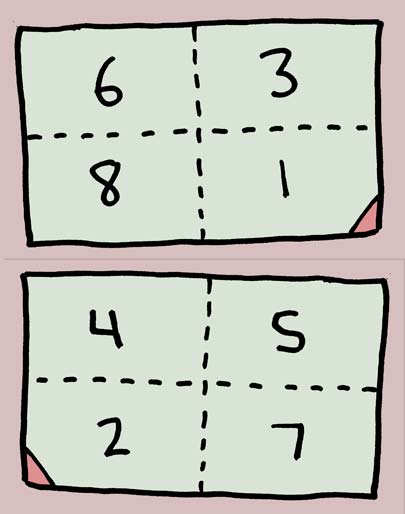
2. Try different sizes of paper, and different configurations. With 11x17 paper, you can have a few cool sizes that you might not otherwise think about. These are some of my favorites.
This one is made by dividing an 11x17 sheet into sixths, which creates a 12-page minicomic that is almost perfectly square.
This one makes an 8-page mini that's WIDESCREEN.
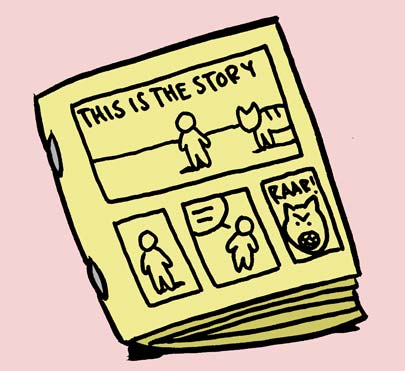
The Cartoonist Conspiracy has created a minicomic about how to make a minicomic. You can download it and print it out here. Now get out there and make one of these, then REJOICE! You are a published cartoonist.
Labels: Tips and Tricks
posted by Zander Cannon @ 4:00 PM
2 comments
![]()
![]()

2 Comments:
can i draw pages separate and then cut and paste them onto the pagination guide? - donn ha, beginning mini komiker
Donn, you should be able to. Obviously you'd just need to reduce the size to fit onto a quarter sheet of paper.
Post a Comment
<< Home